

Easy DIY with James Alexander Lime Wash Paint: The Perfect Finish for Textured Walls in my Cabin Remodel
This blog post is sponsored by James Alexander Specialty Paints and reflects my personal views and opinions of the products.

When I first started remodeling my cabin and thinking about the walls, I knew I wanted to add something that would really elevate the space—something that would make it feel unique, warm, and cozy. After researching different finishes, I stumbled upon James Alexander Lime Wash Paint. It quickly became one of my favorite details of the entire remodel!
What I love most about lime wash is the incredible texture and depth it adds to a space. It's not just paint—it's a transformation. The finish brings this beautiful, earthy warmth that feels timeless. I was a little nervous at first because I’ve never done much DIY painting, but the process turned out to be so simple, and I’m convinced it’s foolproof. If you're a beginner or someone who's never really tackled paint jobs before, you can do this!
The Process: So Easy, Even for a Beginner
Outside of a couple of refurbished pieces of furniture, I had never painted anything, so I was really intimidated to take on lime washing the entire main area of my newly remodeled home. My family loves a good project, and we are all fascinated by any type of build/remodel, so I had all hands on deck when it was time to test out this new thing I had been telling everyone I was so excited to try out!

The products included instructions that were clear and easy to follow. We started with the primer. Once dry, we began with the first coat of the lime wash. Everything I had read and watched beforehand had warned not to get scared by the first coat, so I was somewhat prepared. But, as I mentioned, I had all hands on deck—literal hands. I had four people at various times in various spaces applying the lime wash. We like to be efficient with our weekend projects, so with offers for help, without hesitation, I said yes. In the midst of application, I would be lying if I said I didn’t have a moment of internal panic thinking it was going to look like I had four people applying it.

We used the “cross hatch” method, which involves making overlapping “X” strokes with the brush to create a cloud-like shape. Once we had one cloud, we’d blend in another, repeating the process until the walls were covered. We even did the ceiling in the hall the same way. The thing is, even though we followed the same method, every “X” and “cloud” looked a little different. That’s when my mini-panic set in—but as the paint started drying, I saw that the result was actually a beautiful, cohesive texture. I will say that the brushes provided by James Alexander did seem superior to ones I had purchased from a local hardware store (and I didn’t get the cheap ones either).
After the first coat of lime wash was finished, I decided that one more coat would provide the look I desired, so I went ahead and mixed in the suggested “densifier” with the lime wash for my final coat. This is a binder that helps reduce the “chalking” and provides a more durable finish.
What surprised me the most was how easy it was to apply. The lime wash was super thin, and a little really went a long way! We didn’t have to stress about getting every stroke perfectly uniform. The application went quickly, it dried fast, and even with the variation in our strokes, it all came together beautifully. It turned out looking even better than I had imagined!

Textured Walls? No Problem!
One common misconception I had before using lime wash was that it only worked on flat walls. After chatting with the James Alexander Rep I had gotten connected to, I learned that lime wash works beautifully on textured surfaces too.
The texture in the walls actually worked to my advantage. The lime wash adhered perfectly and even enhanced the uneven surfaces, giving them a character I didn’t expect but absolutely love. The paint settles into the texture, giving each wall a distinct, organic feel that’s hard to achieve with traditional paints. So, if you’re working with textured walls (like I was), don’t hesitate! I can not imagine this area of my home without the warmth and texture the lime wash provides now that a flat paint would not have achieved!

Why James Alexander Lime Wash Paint is a Game-Changer
If you’re looking for a finish that adds dimension, warmth, and a bit of rustic charm, lime wash is your go-to. Not only does it have a beautiful, soft matte finish, but it’s also eco-friendly, breathable, and versatile. It feels like a luxurious upgrade that you can achieve without the cost of hiring a professional.

I can’t recommend James Alexander Lime Wash enough—it’s truly one of the standout details of my cabin remodel, and I’m so happy I gave it a try. If you’re thinking of refreshing a room or transforming a space, this is an easy, beautiful, and foolproof way to make a lasting impact. You don’t need to be a pro to get amazing results!
Happy painting!

Elevate Design with Details | Nostalgic Warehouse
This blog post is sponsored by Nostalgic Warehouse and reflects my personal views and opinions of the products.

If you have been following our remodel of The Cabin you know that one of the biggest goals was that as we tore things down to build them back up with new things, the goal was that it would actually end up looking old. Looking as if it had been for years. The only way to do this is in the details. This is something I tried hard to focus on.
Throughout a build or remodel, sometimes things are just automatically chosen from the quickest, easiest thing a contractor has been accustomed too. Hardware for instance - the same black knobs, white switch plates and outlet covers, the hinges that came with the door. It’s in those details that if you give It some thought and throw in some details a huge impact can be made.
I had previously used Nostalgic Warehouse hardware on The Charming Glass House and knew that it would be a perfect match for The Cabin. The New York Collection is my favorite. I selected the New York Long Plate with the Homestead Knob. It is timeless and charming which was exactly what I was looking for. I chose the antique brass finish. I also added the Ball Tip Hinges and Switch Plates in the matching finish.


Nostalgic Hardware is made in the USA and is crafted with high quality materials to ensure longevity. The style and quality will withstand the test of time both adding charm presently and will age well with the cabin with its timeless style. Let’s take a closer look…
Entry Set

I love the simplicity of the New York entry set with the homestead knob. The only locking function is the deadbolt which was different from what I was accustomed to but has been sufficient. It is crafted from solid forged brass making it durable. This set comes in 8 finishes. They also offer a handle set in this collection.
Interior Knobs

The knobs are offered in privacy, passage and double dummy. They also come in 8 finishes. Installation was super easy. The oval in the homestead knob adds extra charm and brought in more of the old world vintage detail that I wanted. They really elevated each door and complimented all my various paint colors so well with the antique brass finish.
Hinges

The ball tip hinges are one of my favorite details. Hinges can be such an oversight. Adding this pop of detail and charm elevated things so much throughout the cabin. It was fun to see how much these simple little hinges could make such a big impact. They are crafted from high quality steel and when I unboxed I was surprised with how heavy duty they were. The quality is great and the detail is charming and impressive.
Switch Plates

I was set on wanting brass switch plates and outlet covers. I was pleasantly surprised when I found these with Nostalgic Hardware. They are one of the more affordable high quality options I found and they instantly elevate the design. It is a classic and elegant detail that could fit well with many styles. There are 7 finishes available.

In conclusion - I love this hardware and you should totally use it if it’s caught your eye! It will elevate your space and add high quality timeless detail that is both durable and charming! This hardware is one of my favorite details from my remodel of The Cabin!

Vintage Tub and Bath Bathroom
This blog post is sponsored by Vintage Tub and Bath and reflects my personal views and opinions of the products.

When I started dreaming up The Cabin remodel I knew I wanted it to feel and look old. My husband always joked that we spent a heck of a lot of money to make new stuff look old. But that was the vibe. Old. I wanted things to look like they had always been. Wanted things to feel nostalgic and exemplify old world charm. I really wanted to lean into just simple charming design that would be reminiscent of “grandma’s house”.
One of the first spaces I really had my head around that set the tone for the whole remodel was the guest bathroom. Let’s dive in!
Where it started:

We knew she was getting gutted. Logan had a field day demoing and then we had a blank slate within the confines of the space we had.

I immediately knew I wanted a clawfoot tub. I wanted it to be a true cast iron that would not only stand the test of time moving forward but also look like it had been there forever already. So, my hunt for the perfect clawfoot tub ensued and I was connected with Vintage Tub and Bath. I fell in love with the Heritage Cast Iron Classic Clawfoot Tub by Randolph Morris. After measuring the 54” tub dimensions were perfect so it was the winner! It is stunning in person. It brings the perfect vintage charm to the bathroom and I couldn’t be happier with the quality.

Next up was the shower enclosure. I wanted it to be a mix of a vintage style but also have some simplicity of a bit more modern style. Enter the Deck Mount Clawfoot Tub Shower Enclosure with gooseneck faucet and shower head by Randolph Morris with the Toe Tapper Pop Up Clawfoot Drain. It was exactly what I envisioned. It has just enough detail to be charming and just enough simplicity with the rain shower head to provide a little bit of a modern touch.

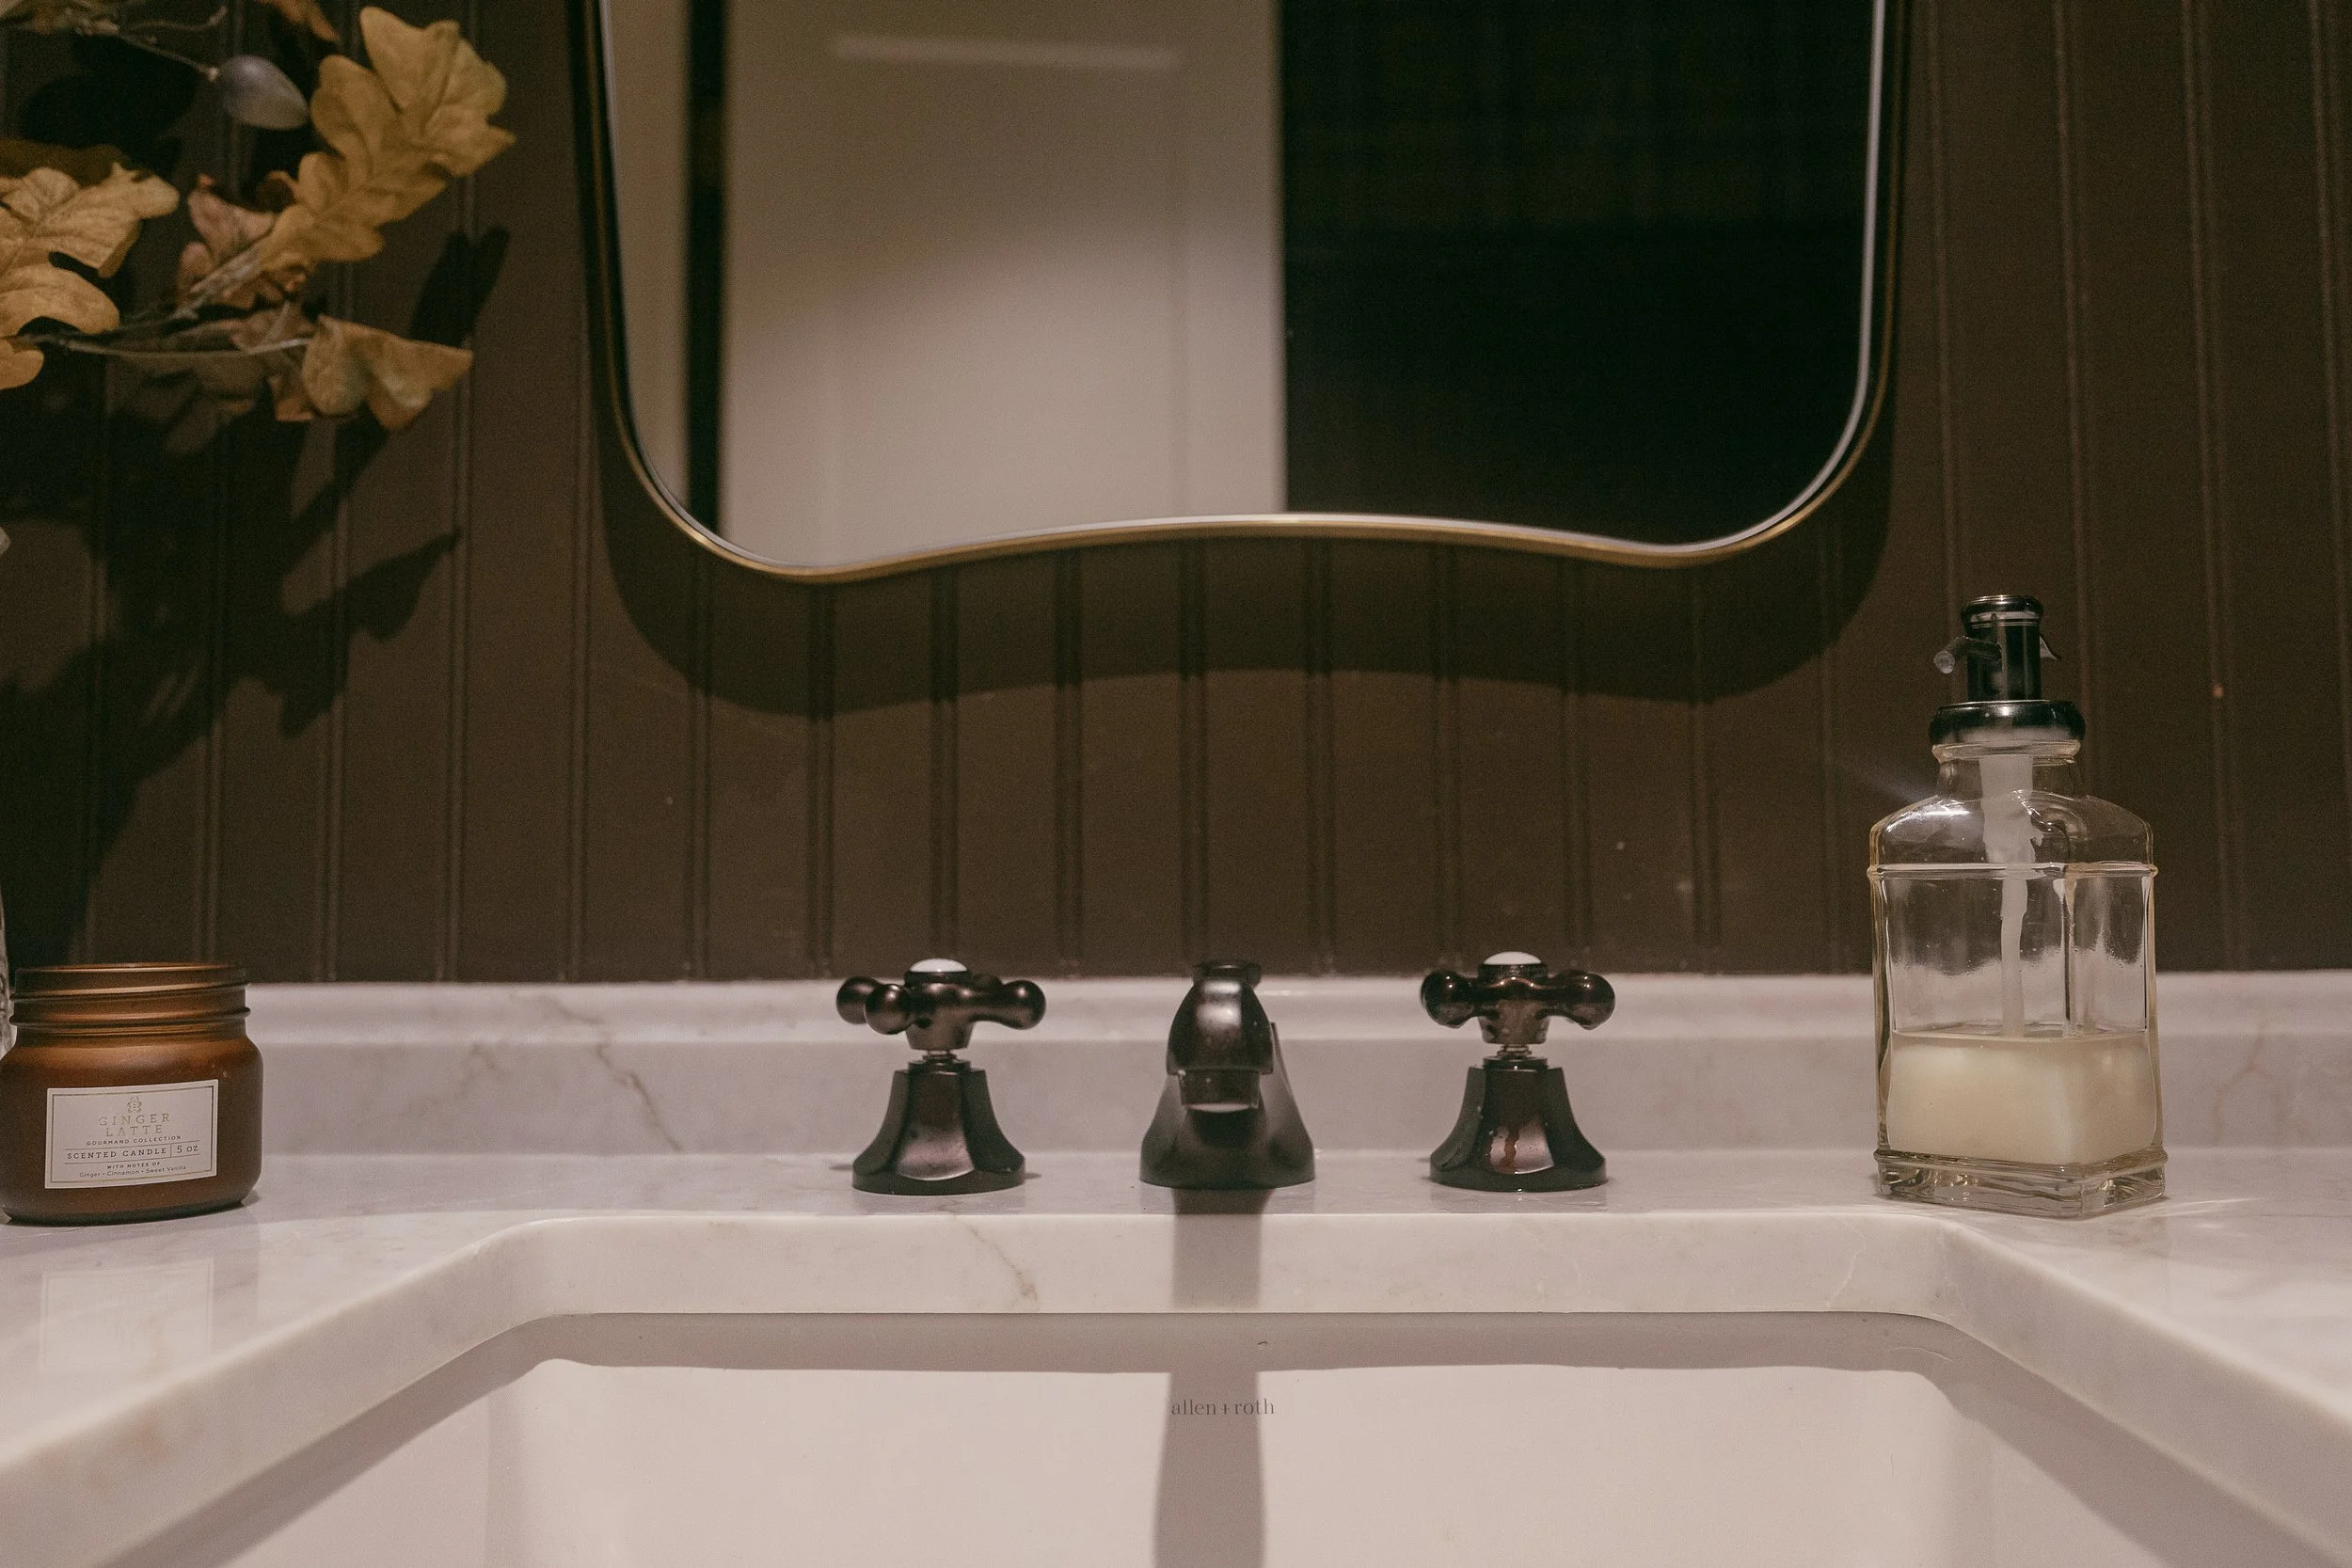
I had a new custom vanity built and again wanted a fixture that was charming yet simple. I wanted it to look vintage with more masculine vibes. The Deco Widespread Sink Faucet with metal ross handles by Randolph Morris was it. I selected the oil rubbed bronze finish to match my other fixtures. I love how it completes the space when paired with the brass mirror and hardware.

From the quality of the materials to the responsive and friendly customer service, I highly recommend Vintage Tub and Bath! I get so many compliments on this bathroom and it may be one of my favorite spaces in this project!
The Cabin
Since starting Seventh Day Design, this was my first personal project, so I was full of enthusiasm to share something on a more personal level.
Where do I start? Okay, let me just jump in…
In December of 2023, we purchased a cabin that we knew would require a major remodel. Since starting Seventh Day Design, this was my first personal project, so I was full of enthusiasm to share something on a more personal level. I was excited to dive in and document the process. What I didn’t expect was the hurdle after hurdle that would completely take the joy out of sharing the experience, which eventually led to me, well… not sharing at all. Even being someone in the industry, as a design professional, I got to walk through the process with a different lens—and I learned a lot of lessons along the way. Some of them were hard lessons to learn.
Now that we’ve completed the remodel, I’m finally in a place where I’m excited to share more about this project!
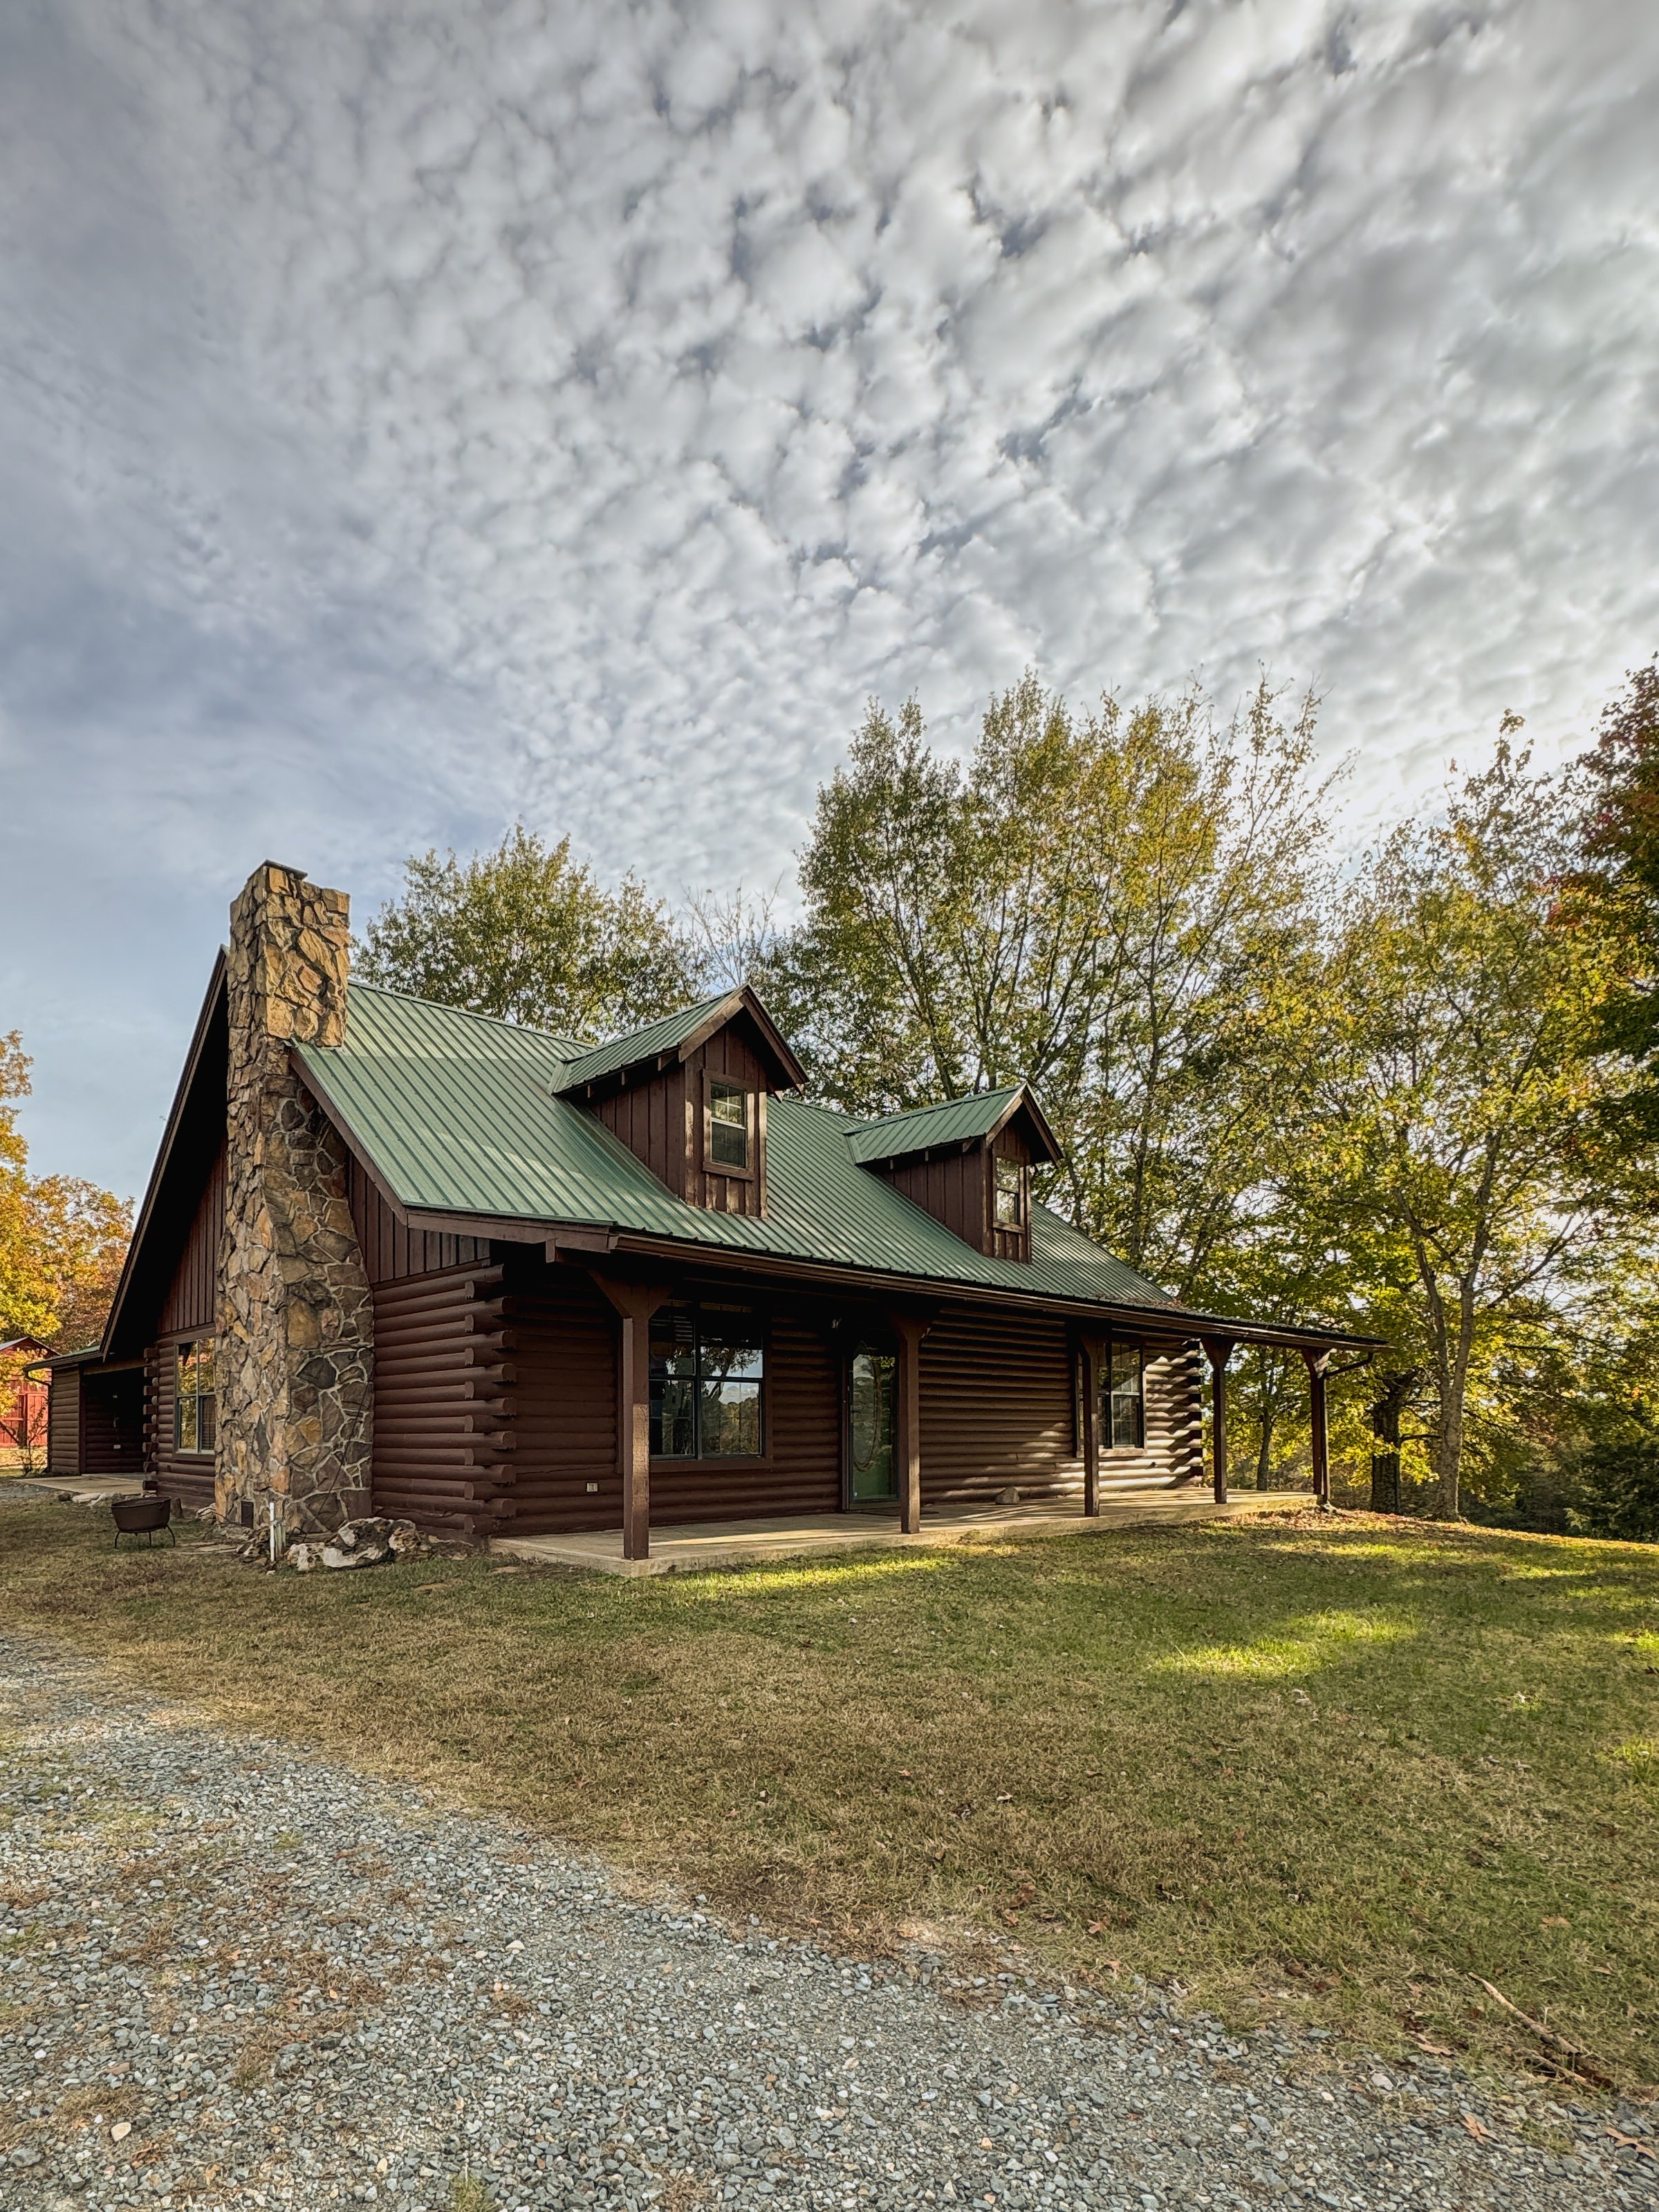
Let’s start with a little backstory. When we first saw the listing, we immediately called to schedule a showing. Upon calling, we were told the seller had already accepted an offer, but the realtor encouraged us to come look “just in case.” We did, and as we drove through heavily wooded areas and up to a pasture, we saw a log cabin sitting atop a hill. Logan and I both looked at each other, feeling as though we had missed our chance. We both knew this was something rare for our area— a log cabin on a hill with 25 acres. It was Logan’s dream down to every detail, and we were literally looking at it.
Feeling discouraged, we left and provided our information as a backup to the backup offer. But I couldn’t get the cabin off my mind. After some time had passed, I followed up with the realtor. She let me know that the original offer had fallen through, the backup offer had also fallen through, and that there was now a cash offer that had been accepted. I told her that, if by chance another offer fell through, to please let us know.
Not thinking there was much of a chance with a cash offer having been accepted, we pretty much wrote it off. But then we got another call. I’ll skip some details—you know how this ends—but we got to make an offer, and it was accepted! No counteroffer, no negotiations—just accepted.
In Logan’s wisdom, he prays for God to open and close doors according to His will. He’s much better than me at maintaining trust in the process. God chose to keep this door open and it seems this cabin was truly set aside just for us. Logan’s dream was finally a reality, and we had a big remodel ahead of us. I’m finally at a place of gaining back joy and excitement to share this project with you. Maybe we will leave out all the frustrations or maybe that’s something we can all learn from together sometime. For now let’s take a look at this cutie cabin and the land she sits on. It really is a dream!
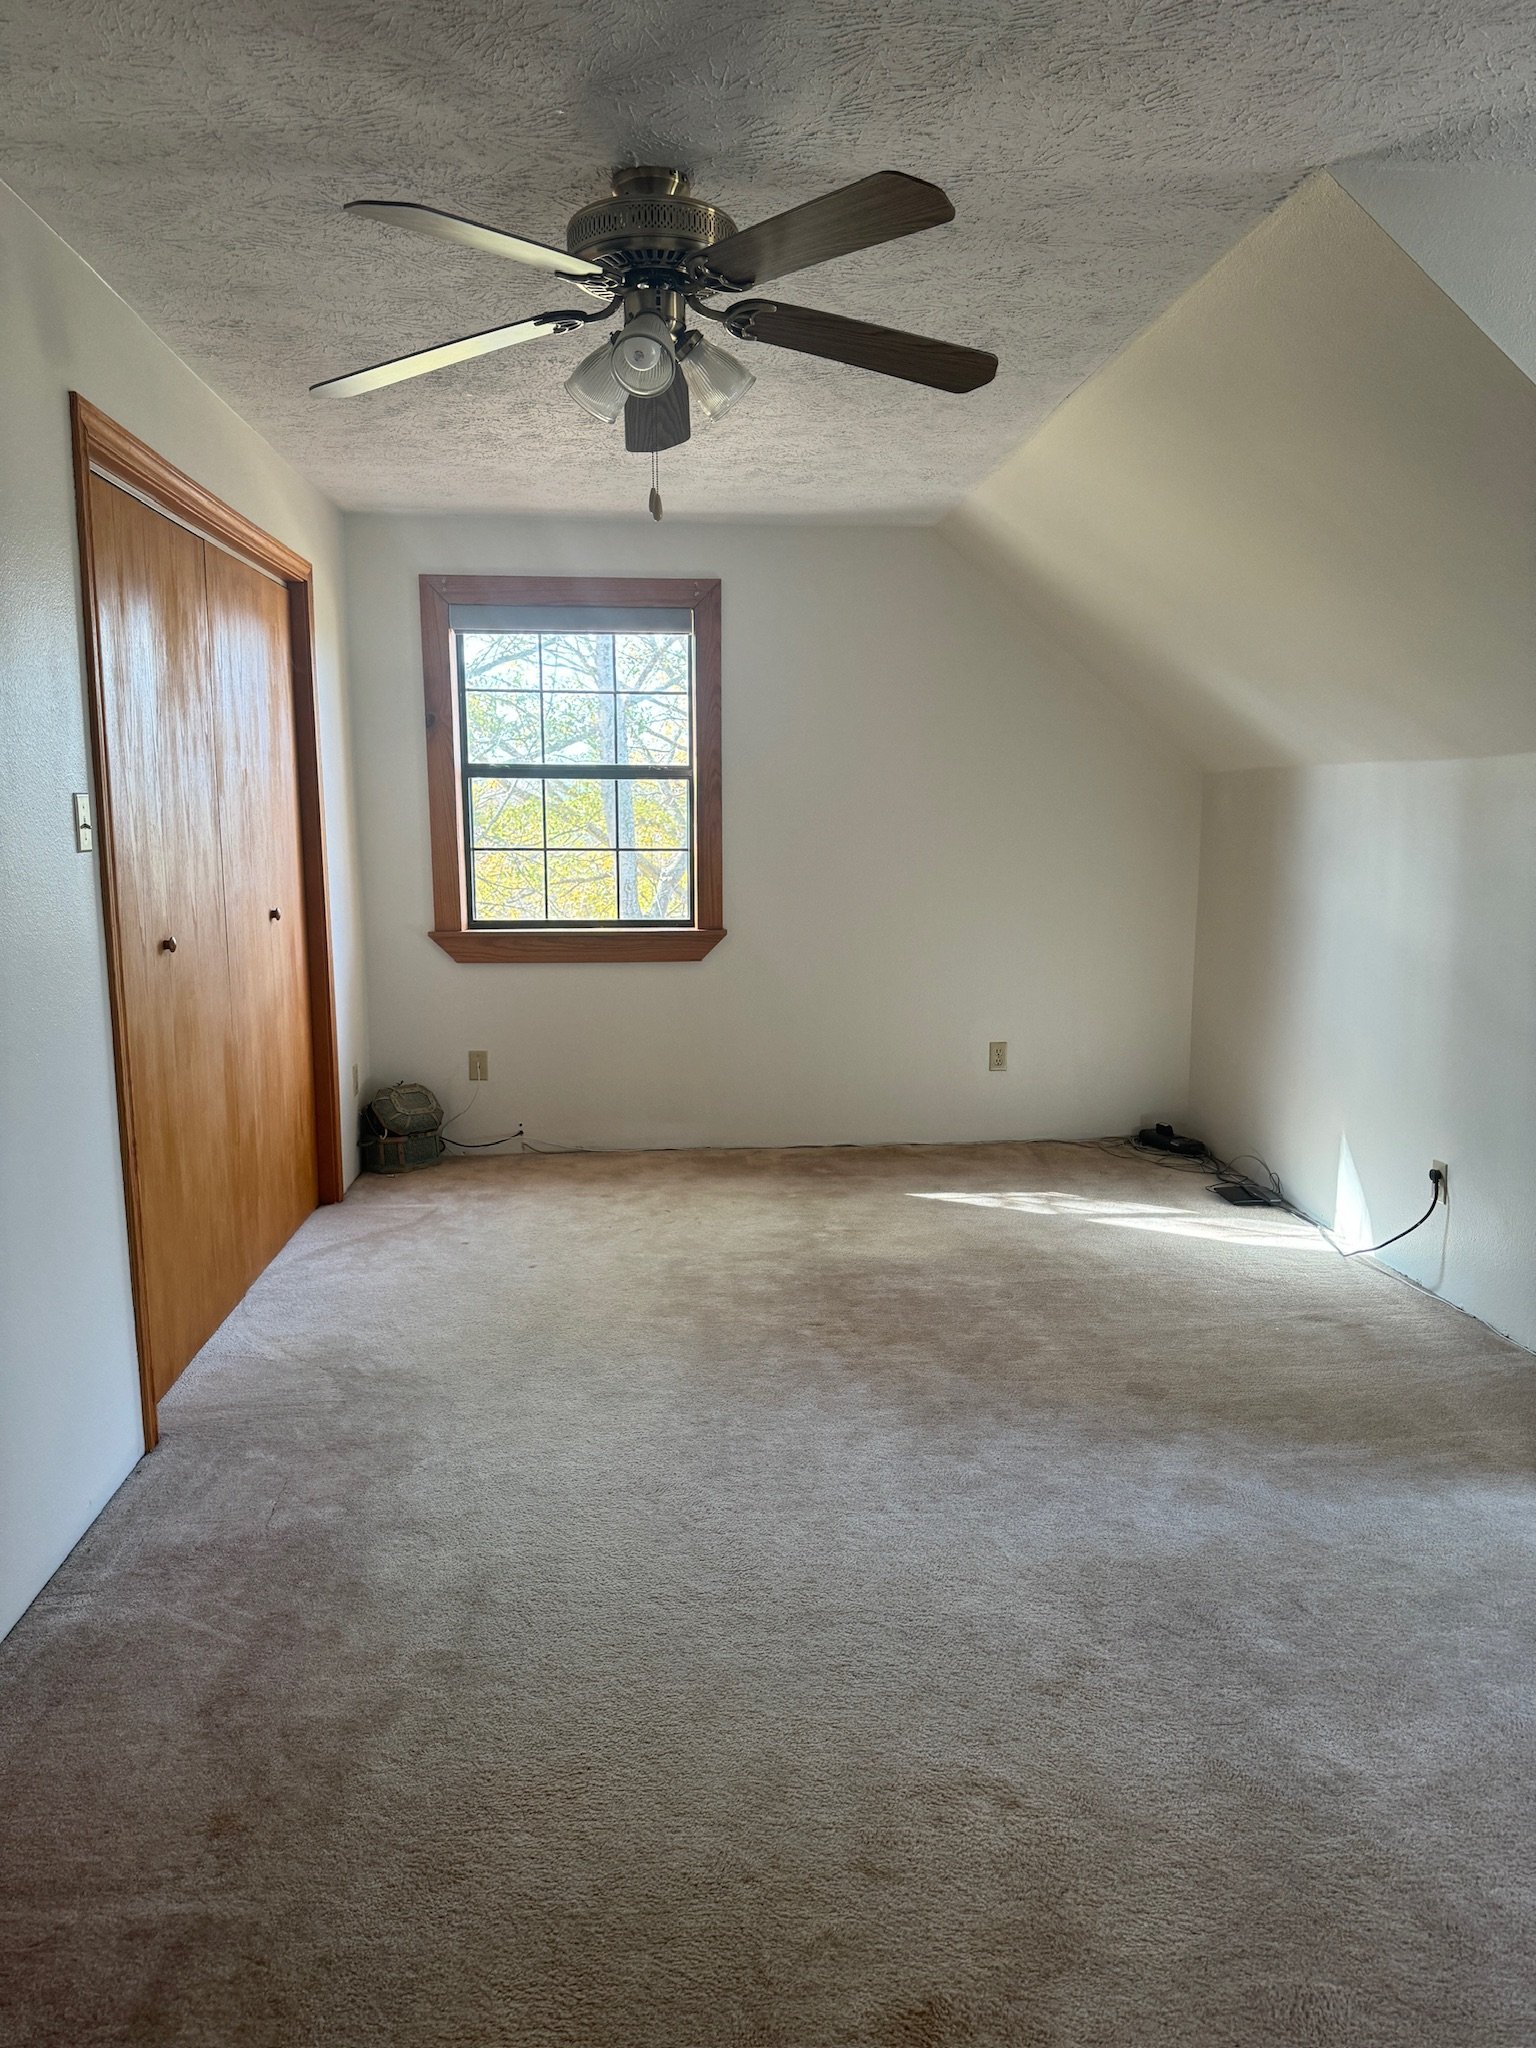
The land is absolutely beautiful. No picture or video has done it justice. It was so exciting to start with such an incredible property but as mentioned, the interior was a big remodel job. Let’s take a look at some before and afters!

Before

After

Before

After

Before

After

Before

After


After

Before

After

Before

After
Before

After

Before

After
I really am proud of how things turned out after a very long, hard process. I can’t wait to take a deep dive into all the details of each space with you! I also had some incredible partnerships along the way and I’m excited to share them with ya’ll! Stay tuned my friends!
Until next time!
-Brittany

Grace House
This space was transformed from a sterile inpatient facility to a warm inviting home.
Grace House Texarkana
When I received a phone call telling me that a local ministry that served women and children in need purchased a new building that they planned to remodel, I immediately knew I wanted to be a part of it. I wasn’t sure to what scale we would be able to do things as it was a non profit but, I knew I was in! This was the beginning of our Grace House project.
Grace House is a transitional home that provides support to “expectant mothers/or mothers within the age range of 17-27 who have been displaced, homeless, at-risk for homelessness, and agree to participate in the programs to reach self-sufficiency”. It’s a ministry that I know first hand is being the hands and feet of Jesus and rescuing women and children off of the street and out of crisis. Having previously occupied a 1700 sqft residential home, they now had 5000 sqft of space to make a safe haven.
The building that was purchased was previously an inpatient special needs facility. Many things about the layout were a perfect fit but the big task was taking things from hospital to home. We met with Grace House to dream up all the things we’d love to do and the amount of those dreams we saw gifted with the labor volunteered is something I’m so thankful I got to be a part of!
The facility has ten bedrooms, five bathrooms, offices and a large living space including a full kitchen. There is also an emergency wing for those needing immediate assistance. One of the first things we knew when planning the remodel is that paint was going to make such an impact. We wanted the space to feel bright as there’s not a ton of natural light so we used Benjamin Moore White Dove throughout. We also updated the commercial doors with Sherwin Williams Tricorn Black paint. The fluorescent lighting was removed and updated with recessed lights and chandeliers in the main area to bring in some charm and ambient lighting. The green carpet was removed and flooring throughout the bedrooms and hallways was updated with donated material. To make the living area cozy and inviting, we created a stone fireplace to anchor the space. The kitchen received the most love utilizing the existing cabinets but updating with shaker style doors and brightening things up with paint. It also received new appliances, gifted Black Pearl Leathered quartz countertops, gifted Marrakesh Berber Black 4x4 backsplash tile and a new sink. Detail and charm were added in the kitchen with a brass faucet, brass hardware and brass accent lighting.

Each room was sponsored for us to purchase furnishing and because there was such a response and a rallying around Grace House to get their facility remodeled and new doors open, we were able to purchase new furnishings not second hand. The goal was to make this space serve as many as possible and allow everyone that entered to be and feel comfortable. We chose a large leather sectional for durability and to warm up the space. The dining space fit 2 large tables with bench seating so all the mommas and kiddos can pile in and have meals together. The bedrooms were completed with trundle and bunk bedding so moms and kids have their own bed and a couple of rooms have a sweet nursery corner. There is also offices, a play room, a work station, a prayer room and counseling rooms that were furnished and staged.
This space was transformed from a sterile inpatient facility to a warm inviting home. At the time of writing this, they are housing 7 women with 5 kids and 4 kids on the way. They serve women in the Ark-La-Tex area and continue to make an impact on women and children in crisis. As always the goal was to create a refreshing place of rest and peace and this time for a group of ladies and kids that were recused from just the opposite. What an honor!


